WireBond Module

We've loaded and numbered our package, we've inserted a ready-to-bond die drawing. Now it is time to actually attach the wires from the die pads to the package fingers. There are two ways of driving this attachment process:

  • Use a connection list specifying die-pad to package finger connection

  • Use an automatic 1:1 die pad to finger bonding

Connection List

This is a simple ASCII file with two columns. The first column defines the die pad number and the second column defines the package finger. However to accomodate special bonding requirements you can also have:

Two Die to the Same Finger

2   225
3   225
One Die to Two Different Bond Fingers
2   255,256
Double WireBond from Die to Finger
2   233
2   233
No Connect Die Pad
2   233
3   0         [0 indicates no connection]
You can prepare the connection list in many ways - using any text editor that writes our standard text files or use a spreadsheet such as Microsoft Excel and then export the results as an ASCII (text) file. This file should be prepared before you start the WireBond module.
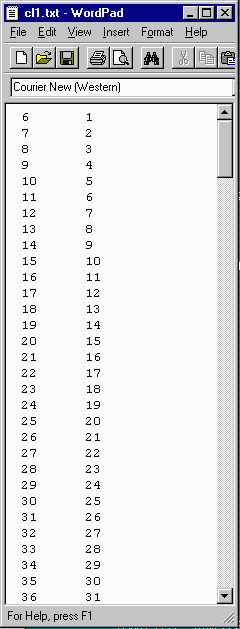
wb9.gif
Automatic 1:1 Bonding

Some cases are very simple - there are exactly as many die pads as there are package fingers so each die pad goes to its own package finger. You could use a connection list; but the Automatic mode takes care of this for you. You can also use the Automatic mode if there are more package fingers than die pads. The program will report which fingers were not used. However you should not use this mode if there are more die pads than fingers.


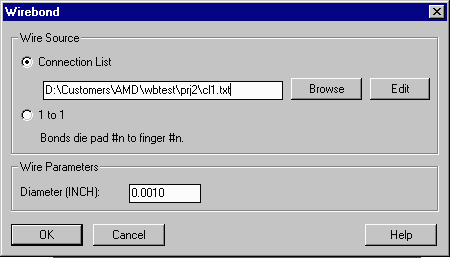
The Wirebond Dialog


wb10.gif


Connection List Select this option if you want to drive the wiring using a connection list. Use the Browse button to select the file. Use the Edit button to open your connection list in Microsoft's Wordpad or Write.
1:1 Select this option if you want WireBond to attempt a 1:1 wirebonding. Only use this option if the number of die pads is less than the number of package fingers.
Wire Parameters  
  Diameter Enter the diameter of the bond wire. This will be used to verify wire-wire spacing during the DRC process.


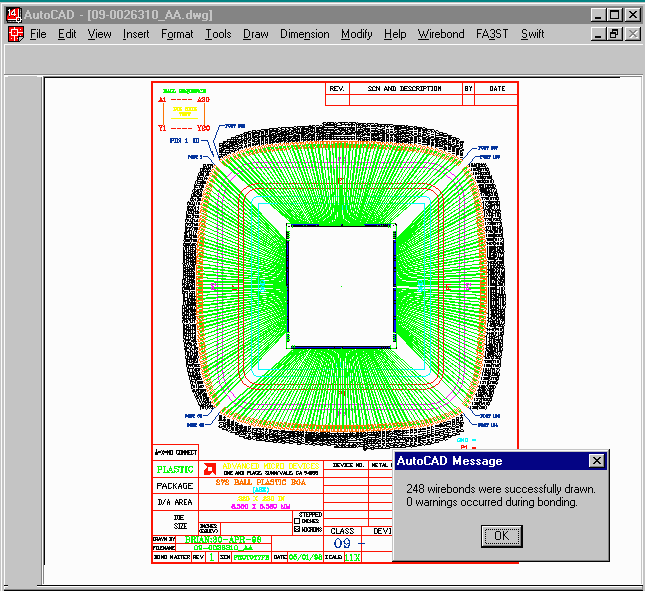
It will take only a few seconds for the WireBond routine to place all of the wires. When complete you will get a message stating the number of connections made and a warning if any connections could not be made. Your results should look something like the screen below:

wb11.gif


Return to:   Wirebond Module