|
Now that our package is loaded and properly numbered we need to select a die
and insert it into the package. The die drawing should have been produced by an ealier
module - Die Clean. This module took a GDSII file, extracted the pad layer, converted
it into AutoCAD, numbered the pads and marked the center of each pad. You must use
a die drawing that went through the die clean process - not just any drawing that was
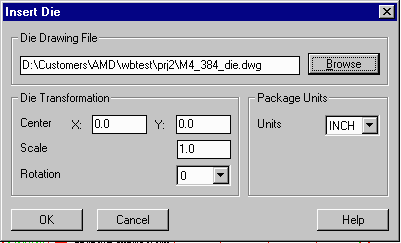
created in an unknown manner.The dialog box shown below will open:

|
| Die Drawing File | Use the Browse button to select the AutoCAD drawing file of your device. |
| Die Transformation | Modifies the center, scale and rotation of the die insertion |
| Center | By default the die is inserted at 0,0. If for some reason you want it inserted somewhere other than 0,0 specify it here. |
| Scale | By default the die is inserted at scale=1. If you needed to simulate a die shrink you could insert it at a smaller scale, for example 0.8. |
| Rotation | By default the die is inserted at 0 degrees. If you need to rotate the die by some increment of 90 degrees you can select it here. |
| Package Units | Since AutoCAD is essentially dimensionless, the die insertion routine has no idea of the units of your package drawing. It does know the units of the die drawing. By correctly selecting the units of your die drawing the die insertion routine can apply the required scaling factor automatically. |
|
Below you can see a screen shot of about 1/4 of the die after it has been
placed into the package.
|