GUI
The RIP GUI takes us step by step through setting all the parameters and running the program. We can also see the command line that is generated in case we prefer use the command line interface for additional tests.
Selecting the Input File and Output Directory
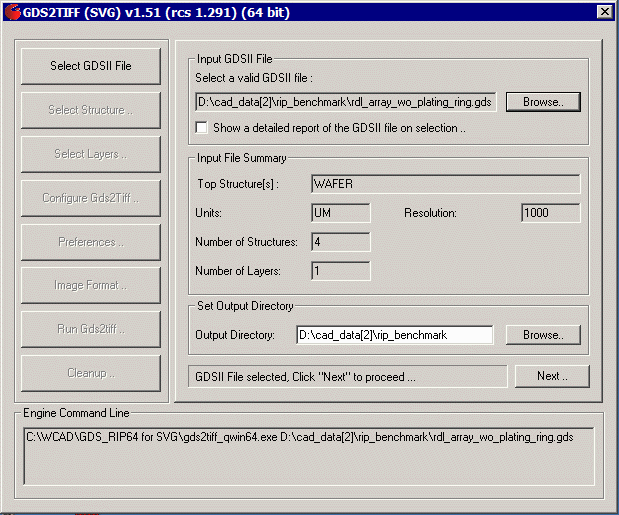
then click Next ...
Selecting the Structure
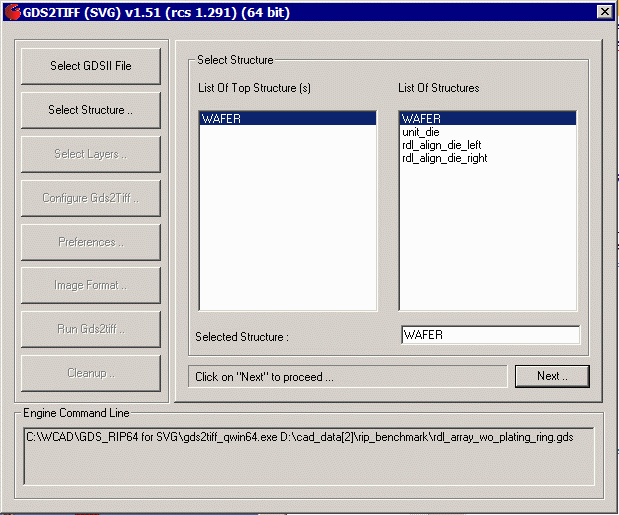
WAFER is the top level structure.
Selecting the Layer
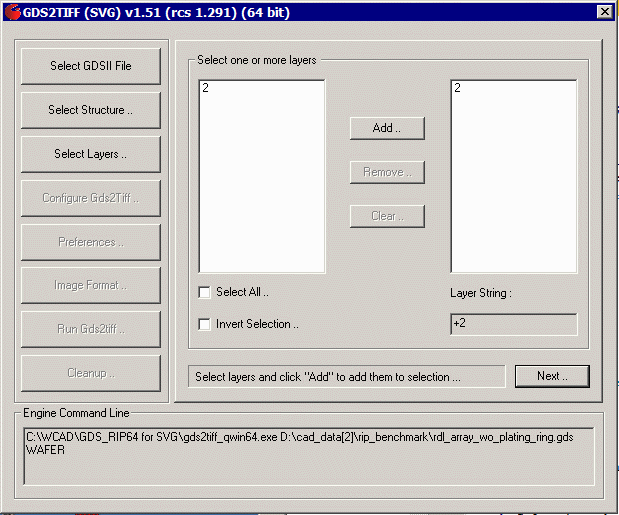
this input file has only one layer: 2
Configuration Parameters
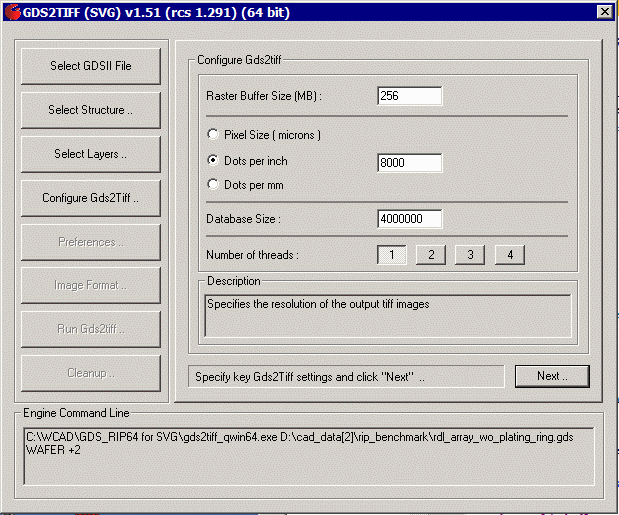
We set out raster buffer to 256 MB (we'll use larger values later) and the DPI = 8000. For the first run we will use only a single thread (we'll use up to 4 threads later to see the effect of multi-threading)
[Note: this dialog has a "bug" that makes it impossible to change the Raster buffer size, DPI and Database Size once it has been intially set. If you want to change these parameters you must exit the GUI and restart it. This will be fixed ...]
Preference Settings
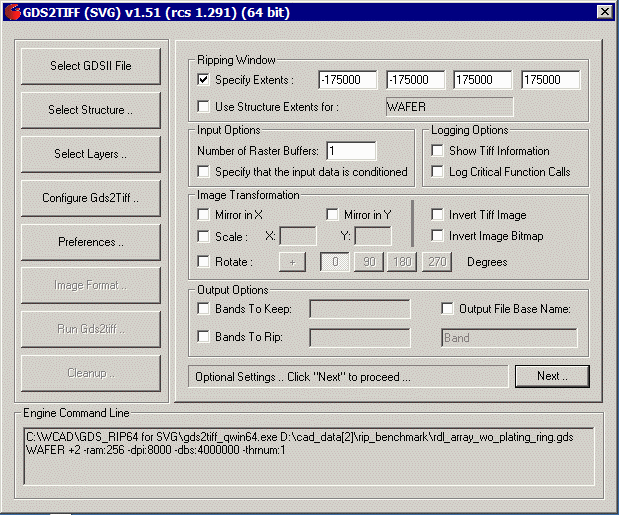
This dialog has more settings. We are fixing our image size to 350 x 350 mm by setting the LL and UR corners of the data extents instead of allowing gds_rip to compute the data extents. We are only using a single raster buffer for this benchmark. We are not going to apply any transformations such as rotation, scaling or mirroring and we are going to "keep" all bitmap data rather than have the program erase it.
Optional Output Settings
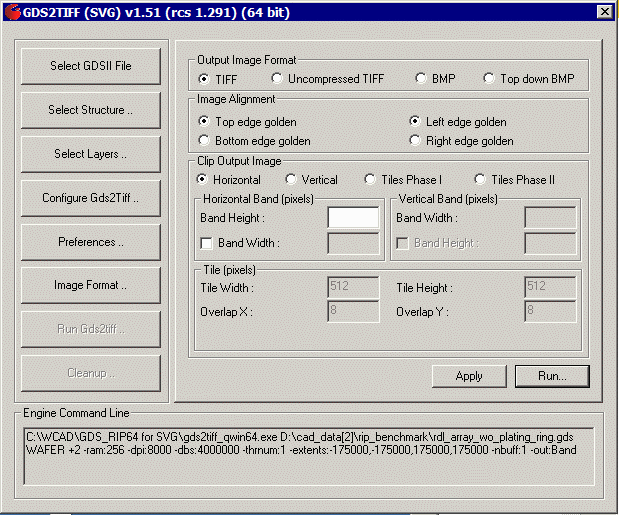
The SVG version of gds_rip allows some special formatting of the output but we don't want or need to do that. Therefore we set the Clip Output Image to Horizontal and the Output Format to TIFF (this is actually compressed TIFF using packbit compression) We set our top and left edges "golden".
Now all we have to do is to hit the Run ... button and the program will convert the GDSII file into a number of tiff images - each band produces one slice of the image.
|


