Running ASM 500 Layer by Layer Based on Line Width

Several CAD programs like Anvil and CADKEY can't export a DXF file with line thickness. Therefore; the designer must group lines with same thickness into a specific layer. At the end, a designer may have several layers, each one will be associated with one thickness which can be assigned during the translation to Gerber.

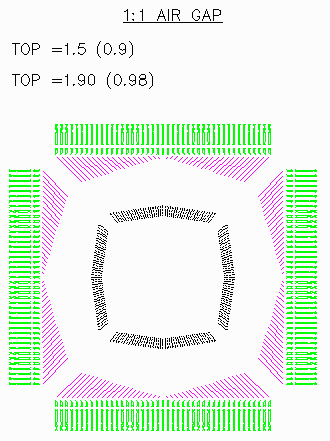
For this example, we have a drawing that was created on three layers and is made up of zero width lines - (shown below). The designer would like to translate all three layers to one Gerber file and apply a specified width to each group of lines on one layer.
In this case we will use the ASM50X translator to assign a 0.002 Round aperture to the layer called 2mils, 0.003 Round aperture to layer 3mils etc.
Here is the procedure.

acad_layers.gif

acad1.gif


Step 1

Notice that each layer is set to a different color and a name which corresponds to desired width. Save the drawing as a DXF file and place it in a directory, like C:\gerber for example. We'll call this file test.dxf and close AutoCAD.
Step 2

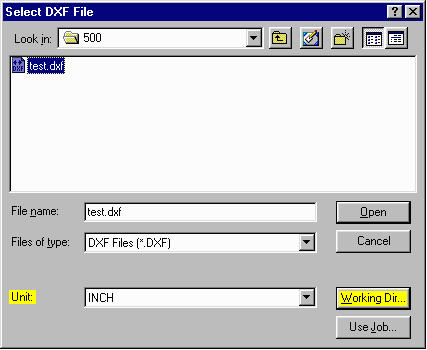
Start the program and select the .DXF file from the directory. In the same menu make sure to select the proper Units - (Inch for this example) - and set the Working Directory to the same location where the .DXF file is located.


select_dxf_dialog.gif


gerber_file_options.gif

Step 3

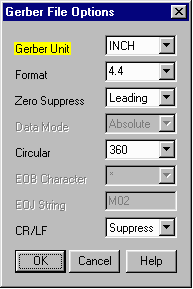
Go to Configure Translator > Gerber Setting - make sure
to set the Gerber Units to the same as the .DXF file - (Inch for this example).


Step 4

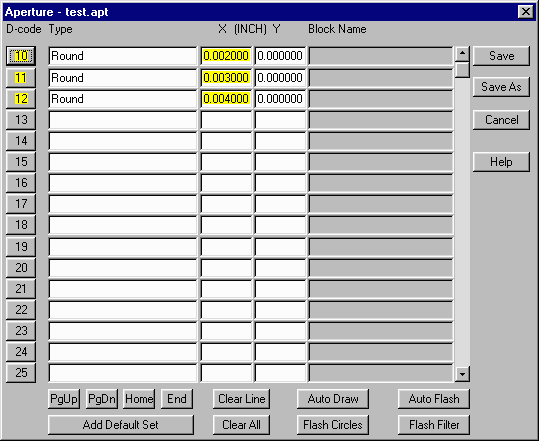
Create an Aperture File - (test.apt for this example). Open the Aperture Menu and create three
Round D-codes, each with a predefined aperture, (2mils, 3mils, 4mils), which will be used to create width for the separate layers in the drawing. You only need to define the X value in the aperture menu and that represent the diameter of the apertue. The Y value is not important for Round apertures. It is only important when defining apertures such as Donuts (Outside and Inside diameter), Rectangles (Width and Height). - (see menu below). Save the menu.

Note: This process can be used for as many apertures needed based on the number of layers in the drawing.

test_aperture_menu.gif


Step 5

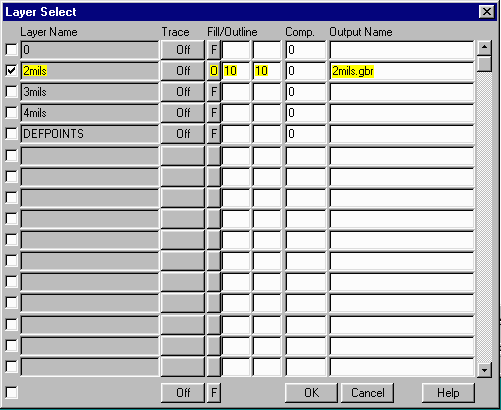
Open the Layer Table and select the first layer to translate (2mils). We're going to translate one layer at a time. Set the Fill/Outline option to O - Outline. The D-code for that layer should appear in the column next to it. We'll leave the Output name for the translated file the same as the layer name (2mils.gbr). CLICK OK to continue.

test_layers1.gif

Step 6

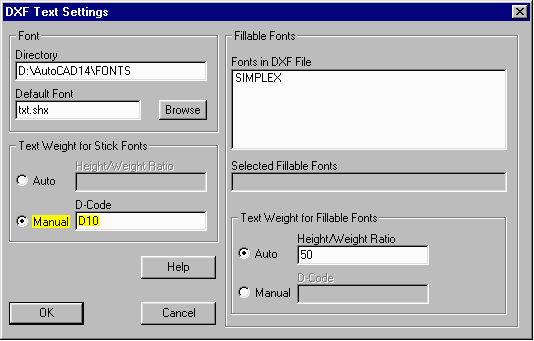
We need to reset some configuration parameters. Go back up to Configure Translator > Text Fonts/Options. Change the Text Weight for Stick Fonts option to Manual and enter the D-Code for the layer we're translating first (D10 for this example).

text_font_options.gif


trans_setting2.gif


Step 7

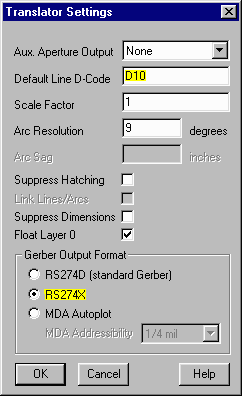
Go to Configure Translator > Translation Options - Set the Default Line D-Code to the same one we're translating first (D10 for this example).

Also, make sure the Gerber Output Format is set to RS274X.


Step 8

Start the Translation. You can View the Gerber Data if you like to see the results.

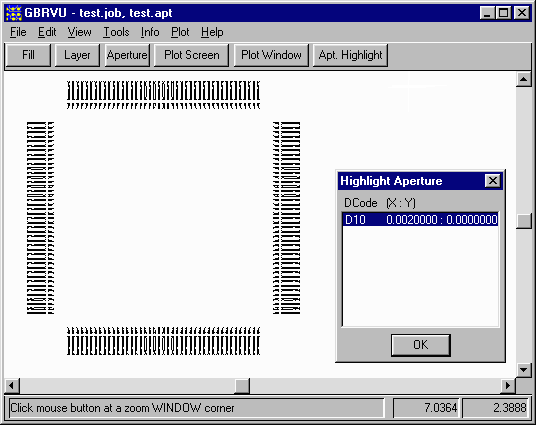
From GBRVU, you can see that the first layer (D-code 10 with an aperture of 2mils), has been been translated properly. We've highlighted the aperture to double check it.

aperture_dcode_d10.gif


Step 9

Repeat Steps 5-8 - This time selecting the second layer, d-code, and aperture definition. Continue steps 5-8 until each layer has been translated.

Note: This process can be used for however many layers are necessary to be translated.


Step 10

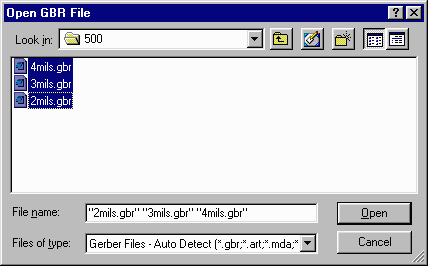
Now, we have 3 separate Gerber files for each layer we've translated. From GBRVU, go to File > Open. Select all the .GBR files. Press Open.

gerber_files.gif


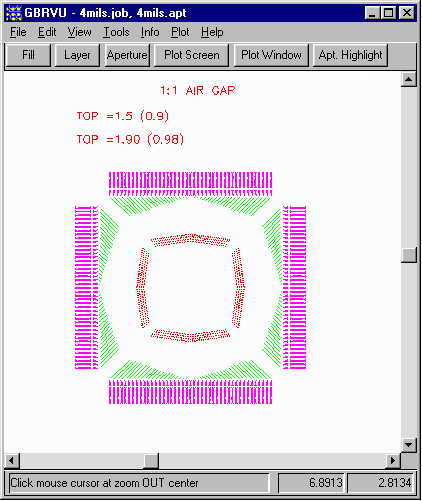
Below, you can see that all three layers are open in GBRVU. Now we're going to merge these three layers into one file.

gbrvu_3files.gif


tools_film_merge.gif

Step 11

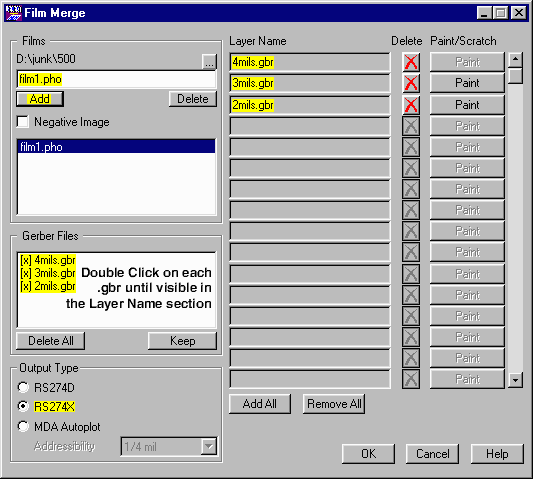
In GBRVU, go to Tools > Film Merge
to open the Film Merge menu.

In the Films section, choose a film name and click Add - (we've used film1.pho for this example).

Double CLICK on each Gerber File so that they appear in the Layer Name section of the menu. Click OK. We've just merged the 3 .gbr files into one Gerber Film (film1.pho) file.

film_merge_menu.gif


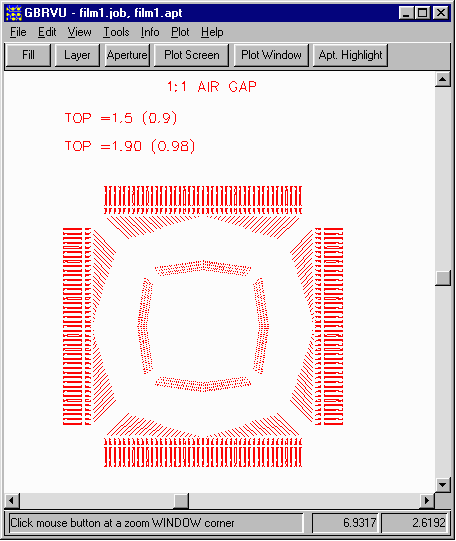
Below we've opened the film1.pho file. You can see that all three original .gbr files have been merged into a new file on one layer.

film1_view.gif